Using Microsoft Graph As Smtp Server
Microsoft Graph as a means of sending out mails with your application? It is possible!
The electronic mail, as old as time itself, or at least the sixties
The need to send mails from an application as a means of notification is a very common thing.
99.9% of the time, this need is fulfilled by dropping a SMTP server into the network and using the standard libraries that almost every coding language has to speak to it.
This approach is fine, even for cloud-based apps! But… you still need to either:
- Buy or rent a SMTP server, be it from an external vendor, or a local IT department
- Configure it accordingly so that it is not marked as a haven for SPAM mail
- In the end, manage that server for patches etc
Lets pour some Azure sauce on top!
One of the Azure services I love for sending mails is SendGrid. It is a 100% SaaS resource you can deploy in Azure alongside your application (or set it up as a shared service), it is immediately good to go save from some DNS tinkering if you want to improve SPAM rating, and best of all: it comes with 25000 free monthly e-mails! Afterwards the meter starts running.
It supports multiple integration interfaces for your application, including the good old SMTP protocol and a REST api (SDK available).
I can’t say anything bad about it, especially when moving on-premises, maybe even legacy applications to Azure which are dependant on SMTP being close by.
However, there is an alternative, that is maybe even more cloud-native than the likes of SendGrid: the Microsoft Graph.
Microsoft Graph as SMTP service? Isn’t it just that fancy API that tells me who I am?
The Microsoft Graph is an abstraction layer on top of (most of) all the individual API’s that Microsoft offers publicly, amongst which the Outlook Api.
If you have an Office 365 environment, the ‘sendMail endpoint’ can be very interesting to send out mails without:
- Needing to deploy any additional resources
- (if you expect more than 25k mails per month) additional costs aside from your base O365 subscription!
The core downside is that this capability is only offered as a REST api. If your code expects SMTP, it is not in Kansas anymore. Refactoring will be needed in this case.
The sendMail endpoint has 2 ways of usage:
- Authenticate against it with user credentials, and send mail as the user him/herself, or an owned shared mailbox etc
- (Much more interesting) allow an Azure AD Service Principal to authenticate as an application context, and send mail with any mailbox (personal or shared)
For this last method, a Service Principal must be allowed the scope ‘Mail.Send’ on the Microsoft Graph Api (in detail steps in a second).
But, what do we see in this permission’s description?
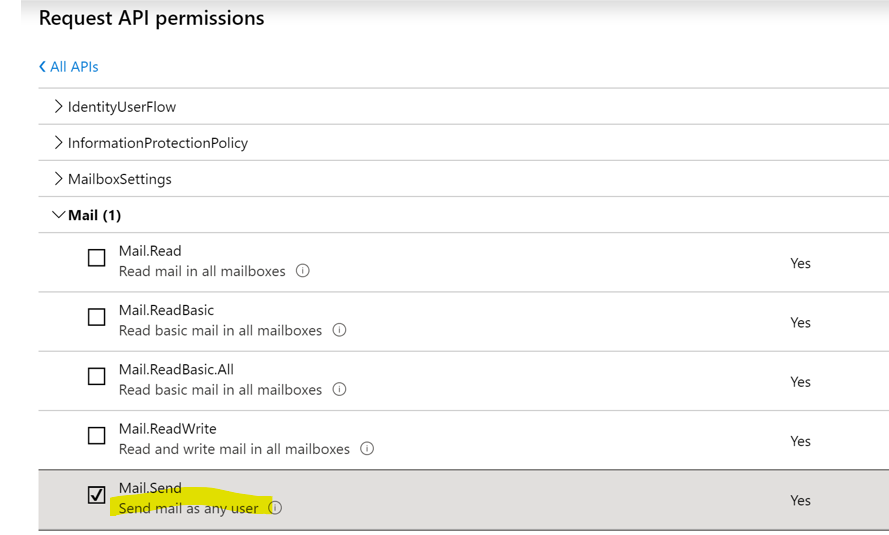
Send mail as any user?? So our application can let the CEO invite everyone for a free barbecue?
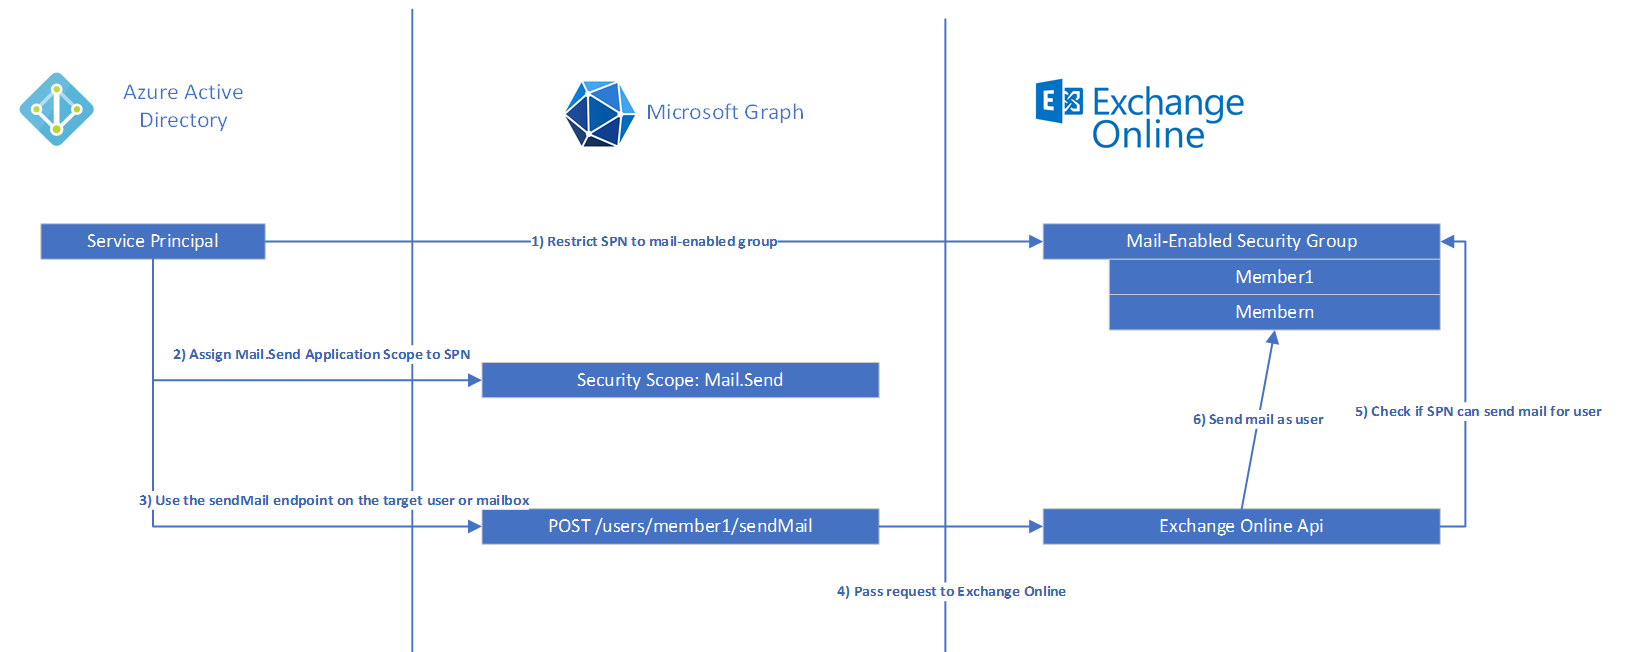
If you leave the configuration like this: yes. But what you can and should do is setup an Application Access Policy in Exchange Online.
This will basically allow/require you to:
- Setup a mail-enabled security group
- Add the mailbox (or multiple ones) you want the SPN to use to it
- Create an application access policy that restricts the SPN to only be able to send mails for the mailboxes that reside in the aforementioned group
From that point on, the SPN is ‘neutered’ and will get a pretty cryptic error message if a mailbox is outside of its reach.
Convinced and wanting to try it out? Ok, lets go?
Not convinced? Re-read this article until you are ;)
Ok, convinced, where do I start clicking?
Three actions are needed to get this going:
Create or update a service principal with the sendMail permissions
Because this involves Microsoft Graph, you need to ask/bribe someone with the ‘Global Administrator’ role in Azure AD to set this up.
- Go to https://portal.azure.com/#blade/Microsoft_AAD_IAM/ActiveDirectoryMenuBlade/RegisteredApps
-
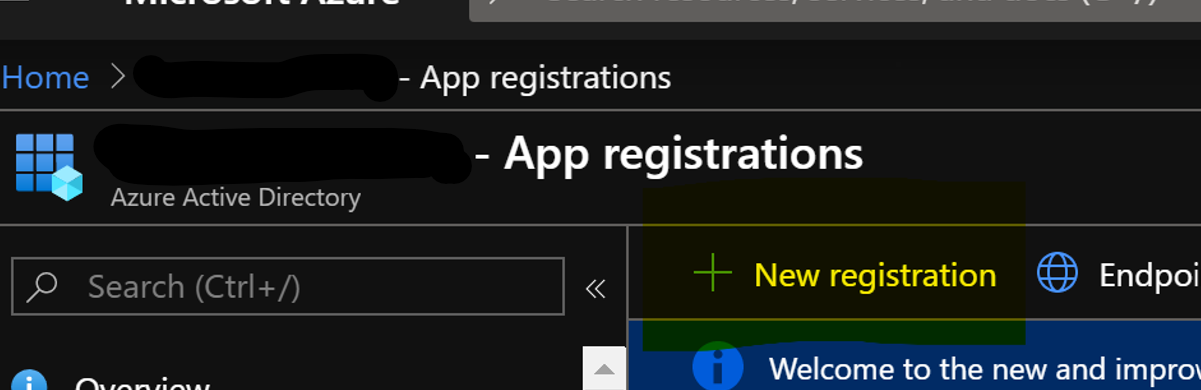
Click on ‘New Registration’
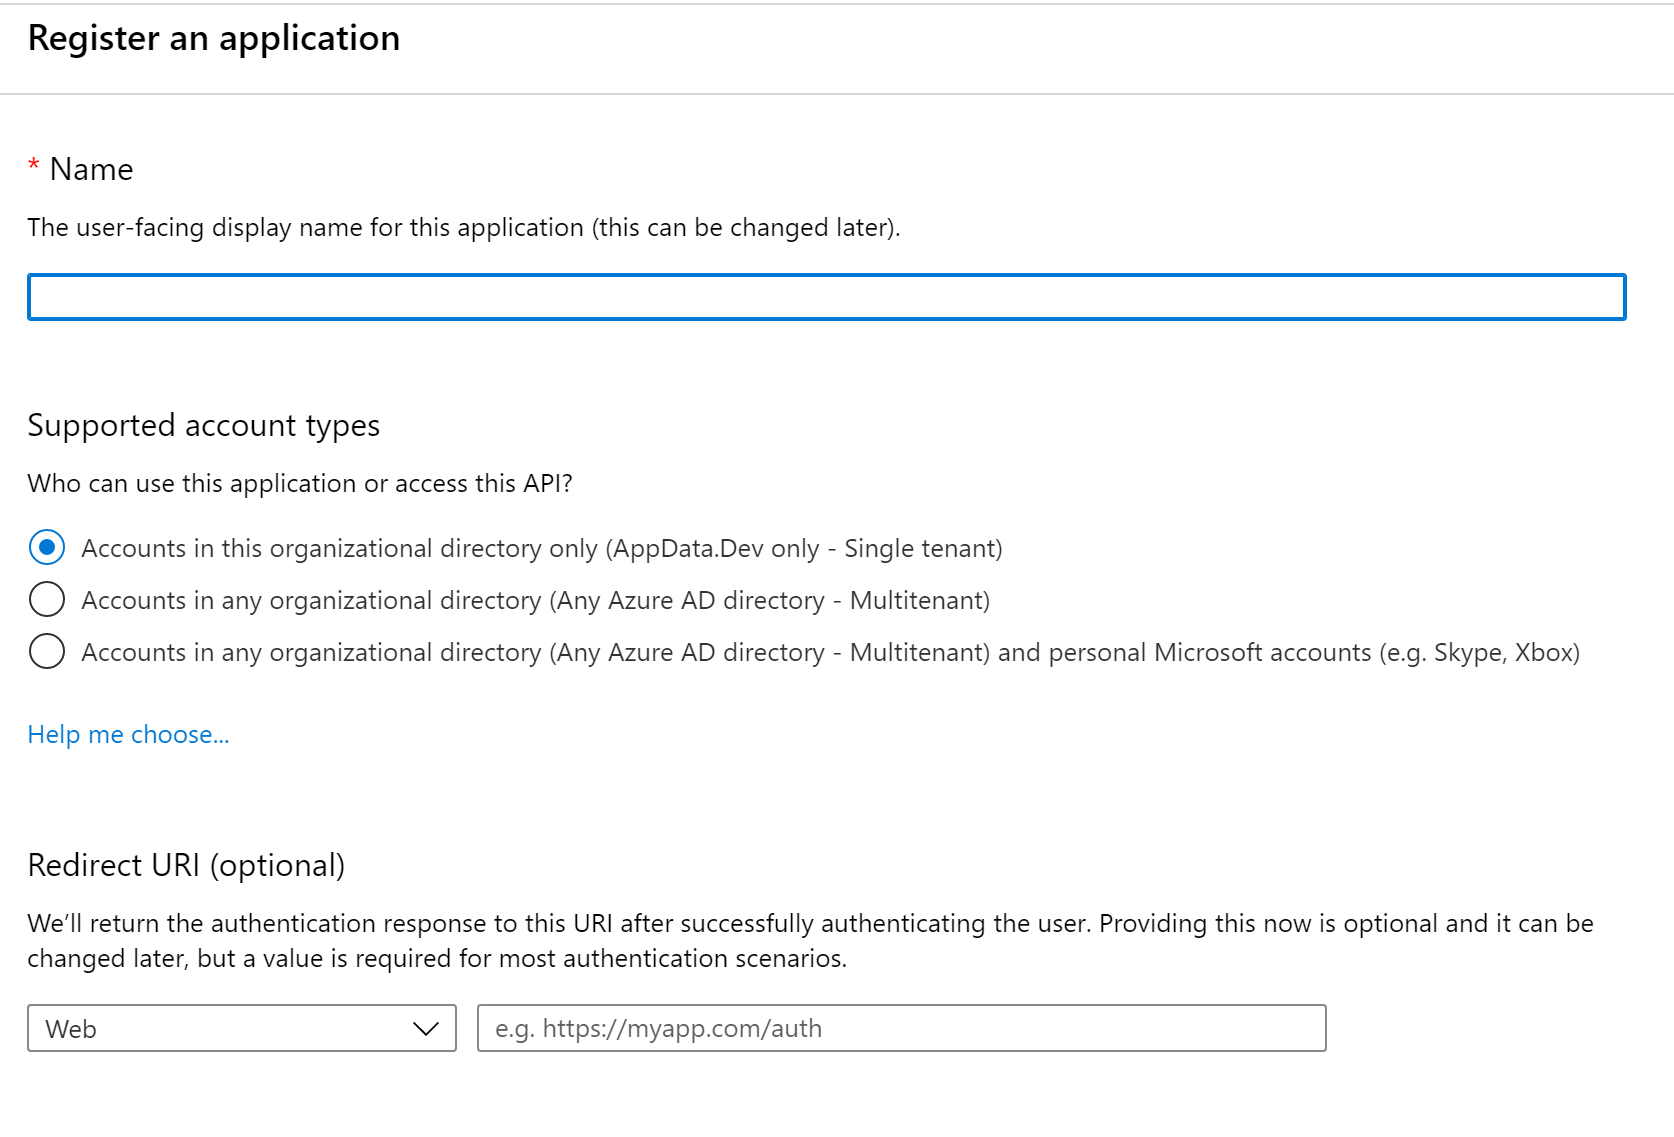
- Fill in the creation form conform your app’s requirements. For just the mail sending, a reply url is not needed. Afterwards, click ‘Register’.
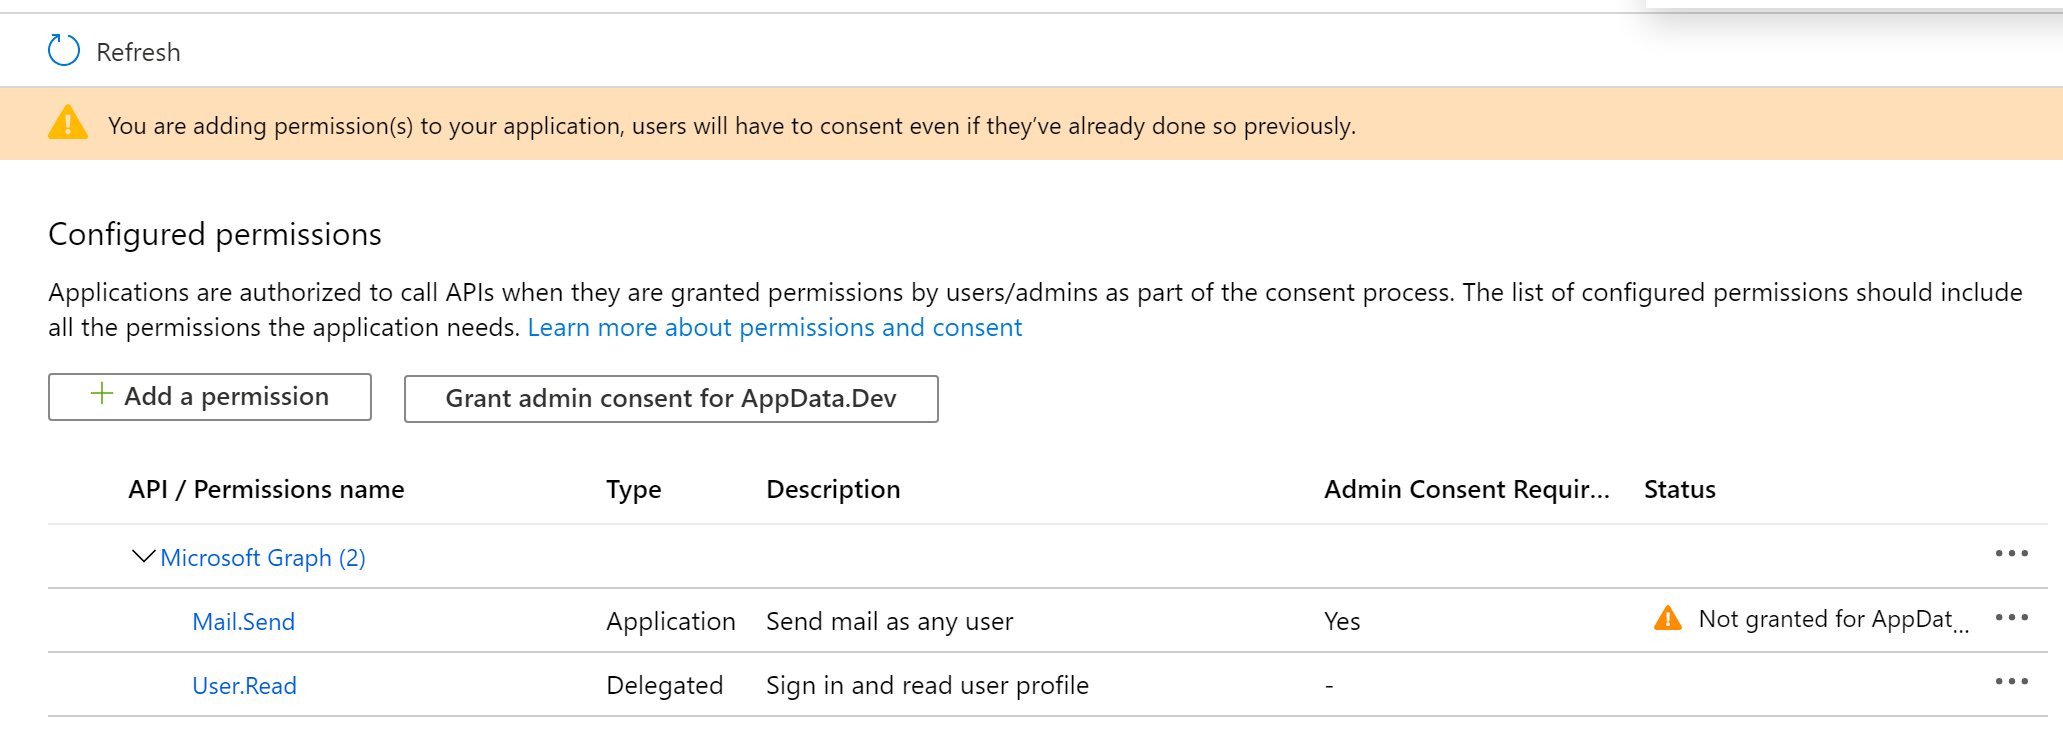
- After creation, go to the ‘Api Permissions’ section and then on ‘Add Permission’
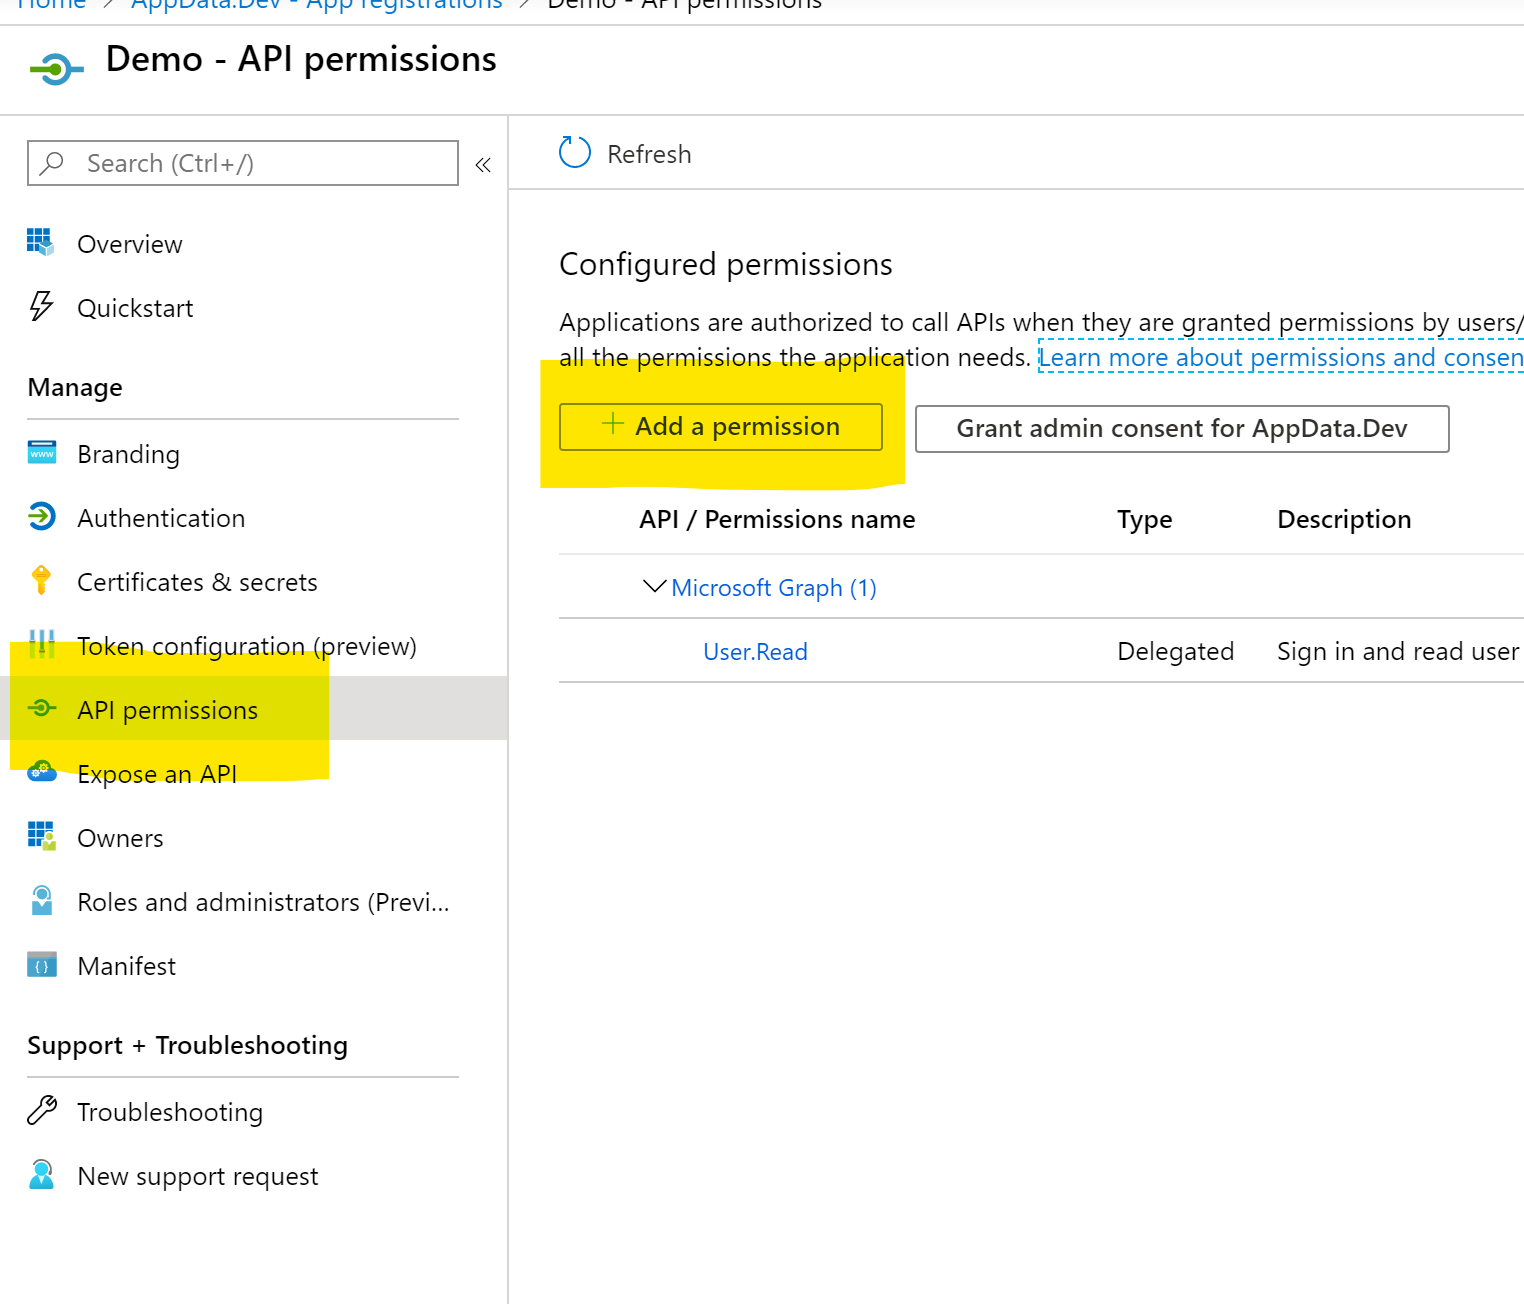
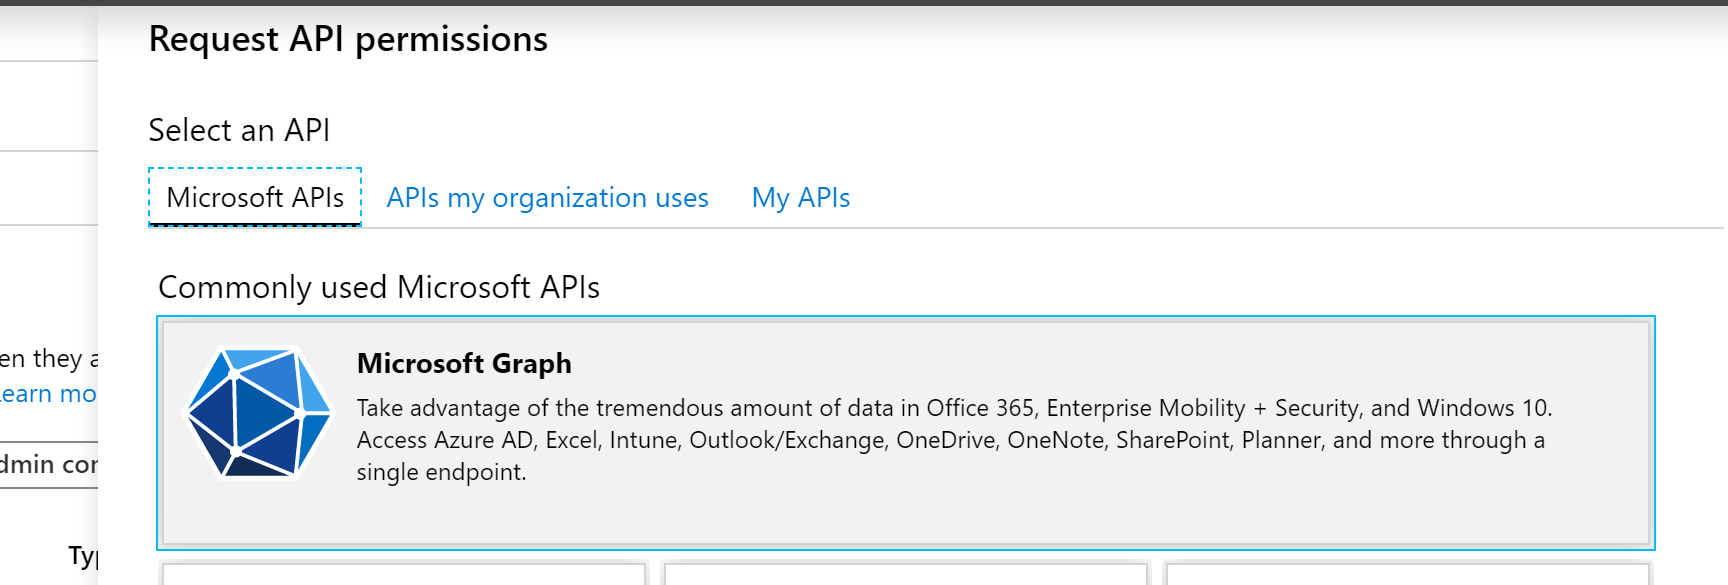
- In the ‘Request API Permissions’ screen, click on the ‘Microsoft Graph’ button
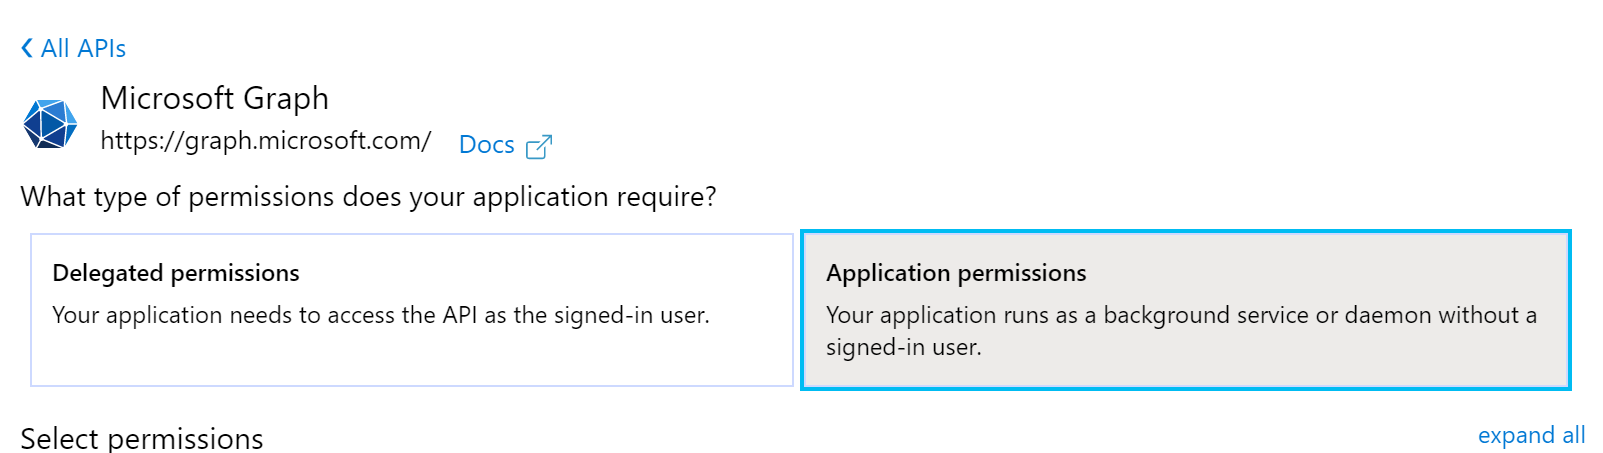
- Click on the ‘Application Permissions’ sub-selection
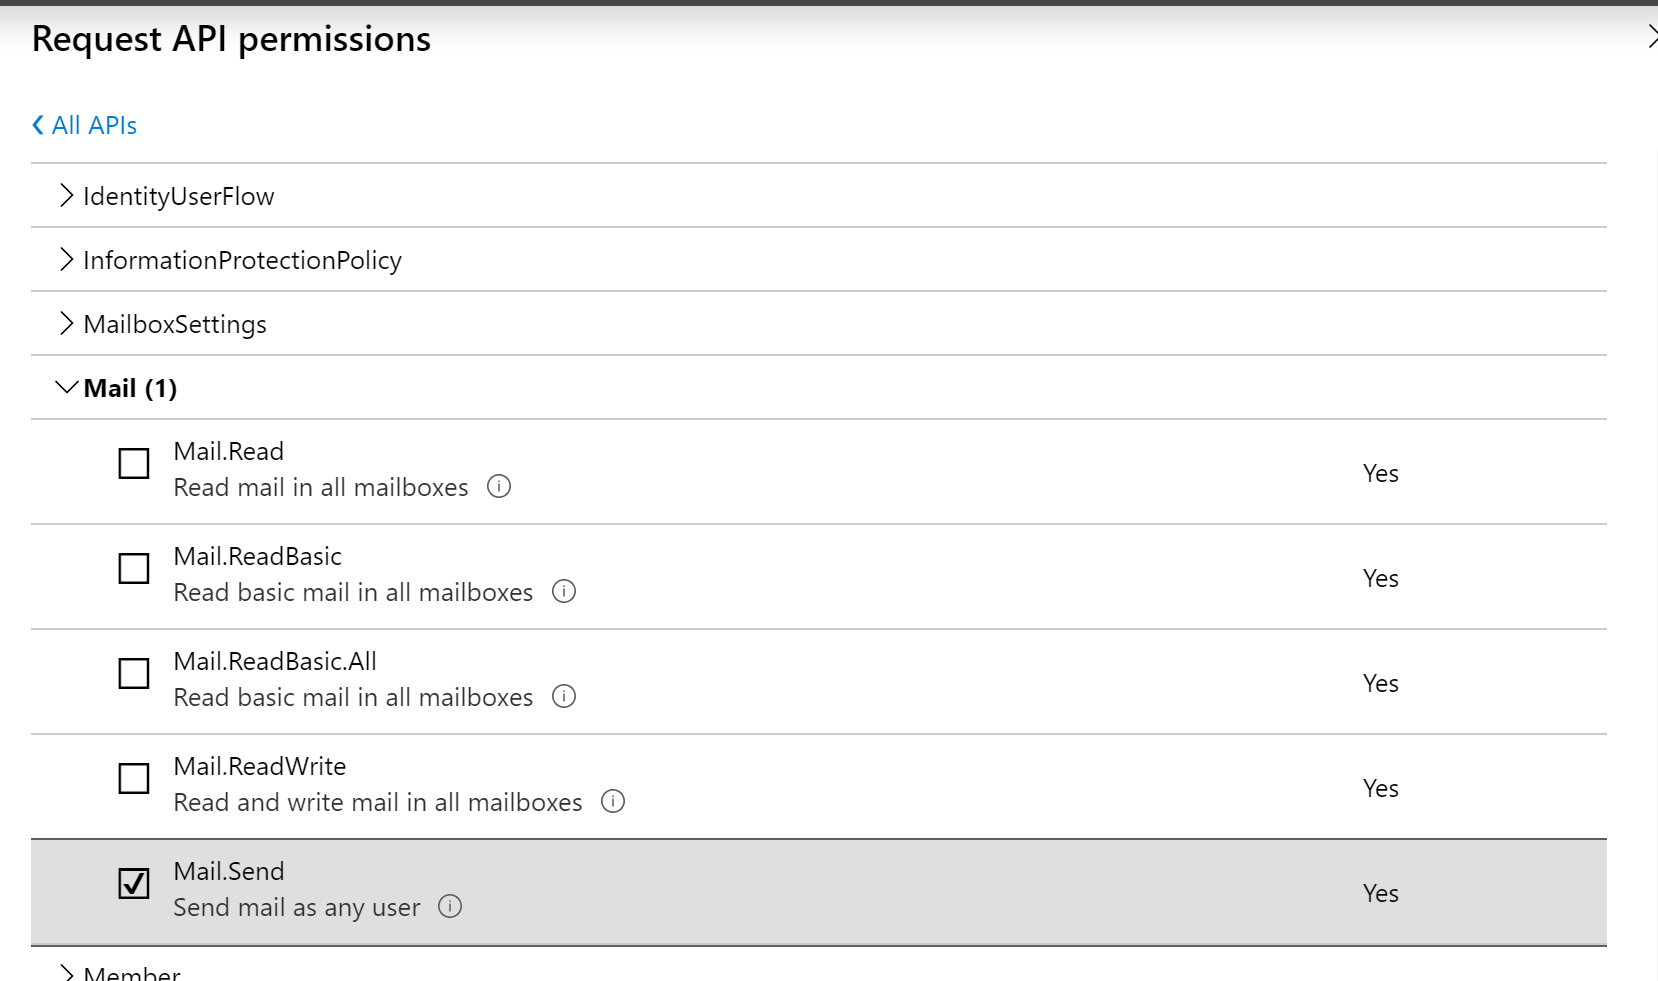
- In the last selection screen, go to the ‘Mail’ section, and check the checkbox next to ‘Mail.Send’. Afterwards click on ‘Add Permissions’ at the bottom of the selection screen.
- If you have the appropriate permissions, click the ‘Grant admin consent for …’ button to activate the permission. If not, involve the Azure AD global administrator to review and approve this.
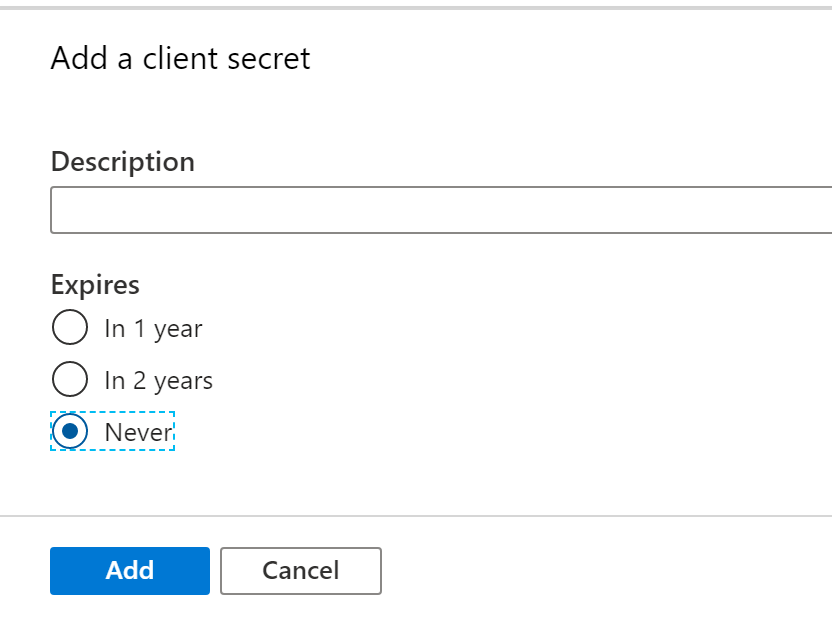
- Go to the ‘Certificates & secrets’ screen and click ‘New Client Secret’

- In the popup, enter an appropriate description for the secret, and select an expiry date conform the application’s requirements. Afterwards, click on ‘Add’
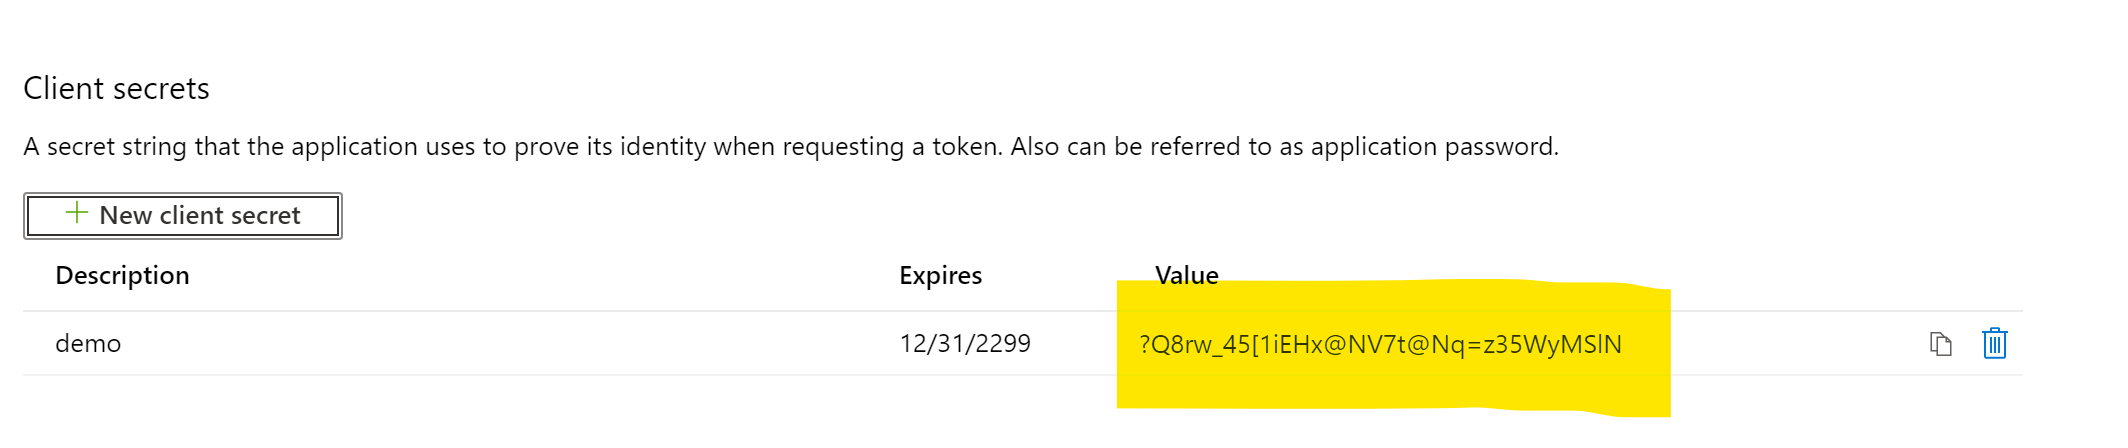
- Back in the main ‘Secrets & certificates’ screen, document the secret generated. You will not be able to consult it again afterwards.
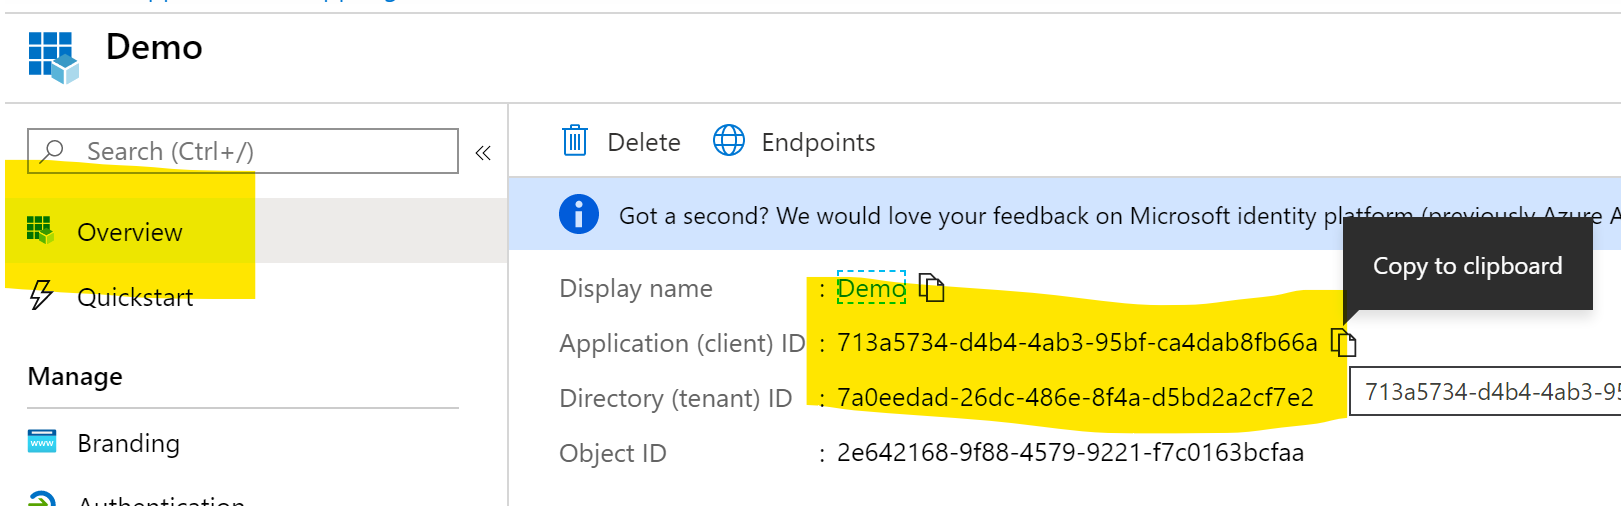
- Go to the ‘Overview’ screen of the SPN, and document the ‘Application Id’ and ‘Tenant Id’
Ok, phew, step 1 done! So what’s next?
Configure the access policy in Exchange Online
You now need to use the application id of the generated SPN to secure it properly to the target mailboxes.
For this you either need to have, or need someone that has the permission to manage mail recipients in the admin insterface of Exchange Online.
-
Go to the admin portal for Exchange Online: https://outlook.office365.com/ecp/?rfr=Admin_o365&exsvurl=1&mkt=en-US
-
Click on ‘recipients’ and then on ‘groups’
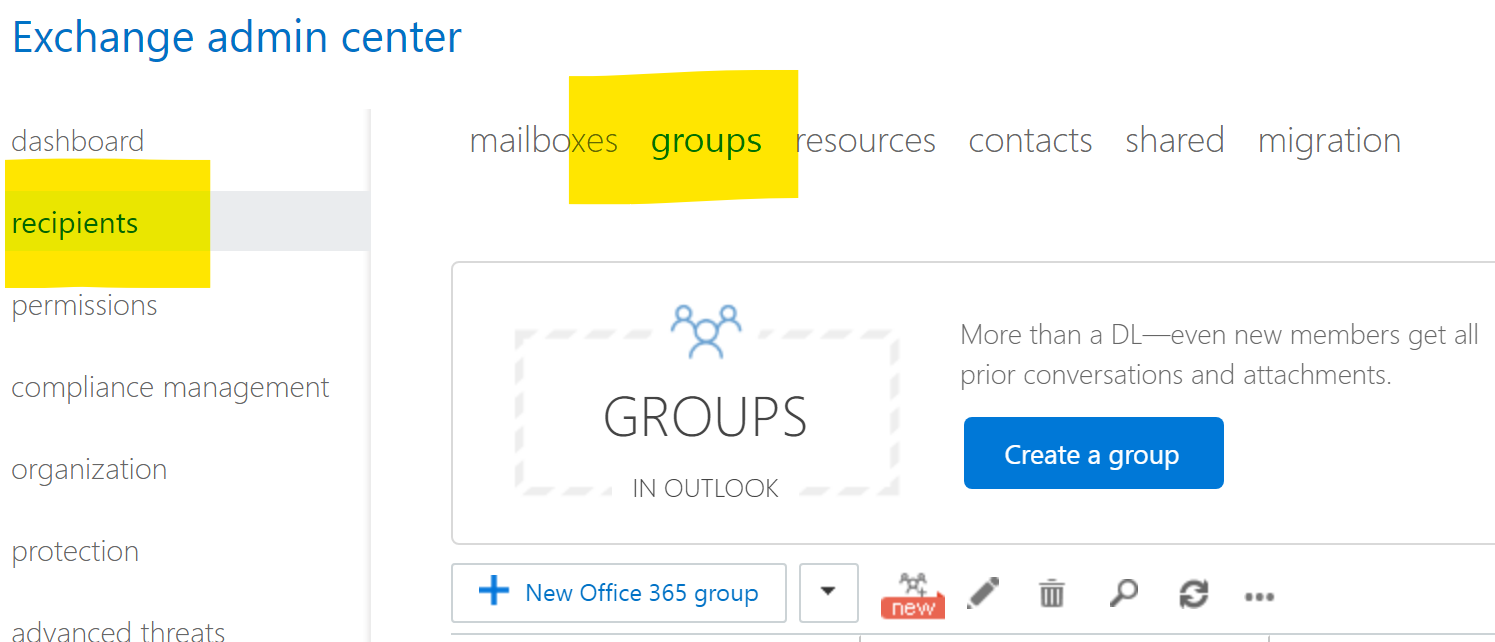
- Click on the arrow next to ‘New Office 365 group’ and then choose ‘Mail-Enabled security group’

- Fill in the following details:
- The display name of the group (eg ‘requestor app name SendMail group’)
- The alias to use ‘requestor app name’_SendMail’
- Leave the e-mail address and suffix as is, it is not used
- On the members section, click the ‘+’ sign and add any mailboxes that need to be used by the application for sending mails
- Click ‘Save’ to create the group. Note down the e-mail address of the group.
Ok, now we can setup the access policy itself. For this, we need to whip out our PowerShell skills.
-
Open a Powershell session (you can search for ‘powershell’ in the start menu)
-
If your account is MFA enabled, ask the Azure AD admin to temporarily disable it, or use an ‘app password’ if allowed. You can also use the V2 version of the module, which supports MFA, but I haven’t verified the procedure with it yet.
-
Enter the following commando’s, using the information documented previously
Set-ExecutionPolicy Unrestricted -scope process -force

$credential = get-credential
# a popup will appear, provide your O365 credentials

$Session = New-PSSession -ConfigurationName Microsoft.Exchange -ConnectionUri https://outlook.office365.com/powershell-liveid/ -Credential $credential -Authentication Basic -AllowRedirection

Import-PSSession $Session -DisableNameChecking

New-ApplicationAccessPolicy -AppId <Application Id of the SPN> -PolicyScopeGroupId <mail address of created security group> -AccessRight RestrictAccess

Remove-PSSession $Session
Congratulations, you saved your CEO from sponsoring a BBQ party!
IMPORTANT: do note that this configuration might need a while to converge. This has to do with internal replication mechanics, and I have encountered up to 4 hours of waiting time before eveyting was consistent!
Now it is time to test out our setup, and actually experience some of that Graph Glorious Goodness.
hey Graph, don’t call me, I call you
Obtain a Microsoft Graph Access token
First, we need to be able to authenticate our calls, so that the Graph can identify our SPN and apply the proper authorization. This is done by requesting a token from Azure AD, which we embed in the appropriate headers of all our calls to the Graph.
POST https://login.microsoftonline.com/TENANT ID YOU NOTED DOWN/oauth2/token
HEADERS
Content-Type: application/x-www-form-urlencoded
BODY (Form Fields)
client_secret: APPLICATION SECRET YOU NOTED DOWN
resource:https://graph.microsoft.com
grant_type:client_credentials
client_id: APPLICATION ID YOU NOTED DOWN
This will return a JSON structure with an ‘access_token’ property. Document/store it! Note that the default token validity is 1 hour. Afterwards you need to do the same call again and obtain a new token.
Next, you can finally call the sendMail API:
POST https://graph.microsoft.com/v1.0/users/EMAIL OF MAILBOX YOU WANT TO USE/sendMail
HEADERS
Authorization: Bearer YOUR_ACCESS_TOKEN
BODY (json)
{
  "message": {
    "subject": "BBQ at my expense",
    "body": {
      "contentType": "Text",
      "content": "I hope it works, or do I?"
    },
    "toRecipients": [
      {
        "emailAddress": {
          "address": "[email protected]"
        }
      }
    ],
    "ccRecipients": [
    ]
  },
  "saveToSentItems": "false"
}
There are some more parameters you can use to control CC, BCC etc.
If all is fine, you should receive an empty response with ‘202’ as a status code. If not, you either forgot a step, or you need to wait for the Exhange Online platform to converge your changes.
For the PostMan users, I have a starter kit of these calls here:
That’s all folks!
Thanks for staying with me until the end! Having questions or issues with this content? Drop a comment below!
Jean out
Comments